Recipe (Miso)
Welcome to Recipe (Miso).
In the past, most families made their own Miso at home.
Although it is common to buy at stores in recent times, its fabrication at home is still popular in Japan.
Because we can make them according to our own favorite styles.
Let’s try it.
Below is the contents of this page.
Let’s try Recipe (Miso)
Roughly speaking, the process is as follows.
- make Miso dough and divide it into small balls
- put balls in a container
- leave the container for fermentation
1. Miso dough
Preparation of Soybeans
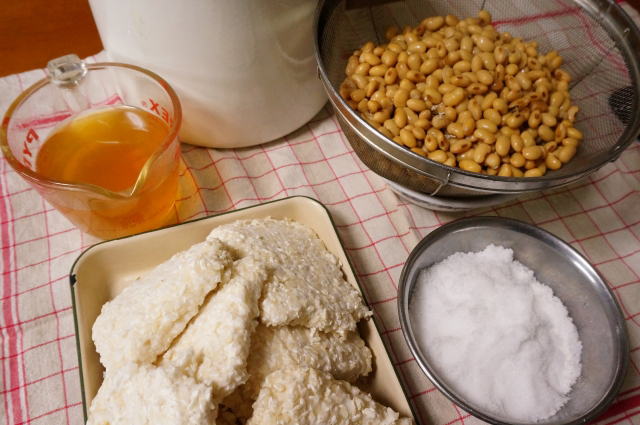
First, we prepare soybeans.
- Soak soybeans overnight.
- Cook them for 2-3 hours until they become soft enough to be easily squashed between your thumb and ring finger
- Drain them.
* Don’t forget to keep the cooking water, because we can use it later.
When soybeans are cooked,
- weigh them
- add salt (10% of the weight of cooked soybeans).
- squash the beans with a masher
- leave them to cool
Preparation of Koji and salt
Next, we prepare Koji and salt.
- Crumble koji
- Mix it with salt (10% of the weight of koji).
Mix all
When the soybeans get cool to below 60℃ / 140°F,
- add the koji and salt mixture (mentioned above)
- mix them well to get the dough with the softness of your earlobes
* If they don’t mix enough, add some cooking water of soybeans (mentioned above).
But if you add some water, don’t forget to add some salt (10% of the weight of added water).
2. Miso container
Then we prepare a fermenting container
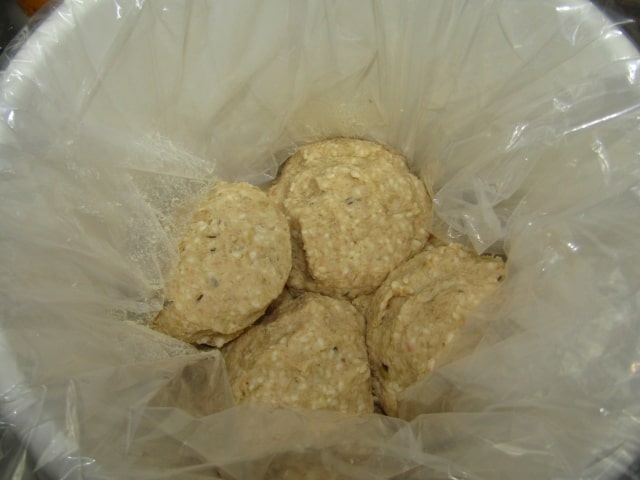
- Shape the dough into balls, approximately the size of your fist.
- Choose your favorite container
* Any type of container will do, as long as it has a lid. Cover it with a plastic sheet, if you like. - Throw the balls into the container. Throw them as hard as possible to get rid of the air inside.
- Level the surface and try again to push out all the air inside
- If you have some fresh sake lees (preferably junmai sake), spread them thinly onto the surface.
* This process prevents bad bacteria from growing on the surface. - Put on the lid
Finally, we’ve got the baby Miso.
3. Fermentation
Next, let the baby Miso ferment.
- For the first month, place the container in a cool place (under 15℃ / 59°F)
* This process is required to inhibit the activity of bad bacteria and help the activity of lactic acid bacteria. - After the first month, it can be stored at room temperature between 15-30℃ / 59-86°F.
But don’t forget to examine the surface once every a few weeks and remove the undesirable molds, if you find them - Let it ferment for about 6 months.
When its surface turns slightly glossy and it releases the Miso aroma, taste it.
If you find it good, your Miso is already prepared.
Take it out of the fermenting container and keep it in the fridge.
But many specialists think that 6 months is only preparation. You can leave it as long as you like to get your favorite.


